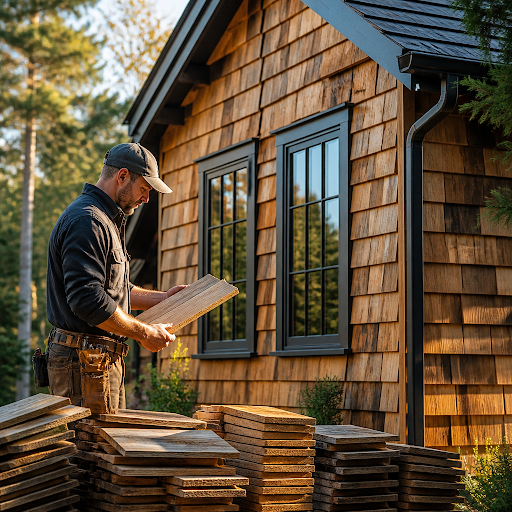
Most siding decisions get made twice: once in a showroom, and once about eight years later when something starts to cup, split or stain. Cedar is one of the few exterior materials that rewards the first decision and forgives the second, provided you pick the right species, the right grade and the right fastening method. What follows is a working guide for homeowners, remodelers and anyone specifying wood for a facade they would rather not revisit in a decade.
Why cedar keeps earning its spot on the wall
Cedar is dimensionally stable for a softwood. Its cell structure holds relatively little resin and shrinks modestly across the grain, which means boards and shingles move less than most alternatives as humidity swings through the seasons. The heartwood also contains natural extractives that resist decay and insect attack without chemical treatment. That combination — low movement plus natural durability — is why cedar shingles on coastal houses can still be sound after fifty years while the trim around them has been replaced twice.
The second reason is aesthetic, and it is not trivial. Cedar takes stain, bleaching oil and semi-transparent finishes beautifully, and when left alone it weathers to a silver-grey that many people buy the material specifically to get. Fiber cement and vinyl imitate that look from twenty feet. Cedar actually does it, and does it unevenly, which is exactly what makes a wall look like a building rather than a rendering.
Species first, product second
People tend to shop by product — “I want shakes” — when the smarter first question is which cedar species suits the exposure, the finish and the look they want.
Western red cedar
The workhorse for pattern siding, trim and larger sections. It mills cleanly, comes in generous widths and lengths, and its warm reddish-brown tones hold semi-transparent stains predictably. If you want bevel siding in long runs, tongue-and-groove, channel rustic or board-and-batten, this is usually the species being discussed.
White cedar and Atlantic white cedar
Lighter in color, finer in texture, and the traditional choice for shingled walls that are meant to weather naturally. White cedar greys out quickly and evenly, which is why it is so closely associated with shoreline architecture. Atlantic white cedar is prized for its stability in wet conditions and shows up in exterior millwork and specialty applications where a fine, straight grain matters.
Timbers and millwork
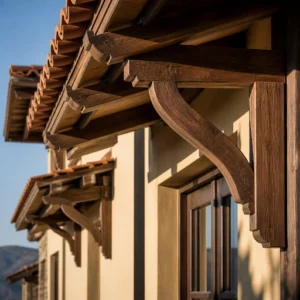
Cedar timbers for porch posts, brackets, pergolas and exposed rafter tails do work that dimensional lumber cannot. Because cedar is light for its size and resists decay, it suits outdoor framing that stays visible. Custom mouldings matter more than homeowners expect: a stock profile on a cedar wall often looks wrong, and reproducing a historic water table or casing is routine millwork rather than a luxury.
Grades are the part nobody reads
Two boards of the same species and profile can perform very differently depending on grade, and grade is where budgets are actually set. Clear vertical-grain material has no knots and almost no tendency to distort, which is what you want behind a dark, film-forming stain. Knotty grades read as rustic and cost less, but knots telegraph through finish and can bleed if they are not sealed properly. There is also the question of sawing: vertical grain resists cupping better than flat grain, which is why premium bevel siding is specified that way. Before finalizing a profile, it is worth reviewing how cedar siding grades are defined and sorted so that the conversation with a supplier starts from the same vocabulary.
Shingles, shakes or pattern siding?
- Shingles are sawn on both faces, so they lay flat and tight. They suit crisp coursework, curved walls, dormer cheeks and anywhere you want a smooth, disciplined texture. On walls, exposures are typically shorter than on roofs so that each course is covered by two layers above it.
- Shakes are split or partly split, so they are thicker and more irregular. They throw deeper shadow lines and read as heavier and more rustic from the curb.
- Pattern siding — bevel, shiplap, channel rustic, tongue-and-groove, board-and-batten — gives you horizontal or vertical lines, faster coverage on large elevations and easier replacement of a single damaged board.
A common mixed approach is pattern siding on broad, simple walls and shingles on gables, bays and anything curved. It reduces labor where labor is expensive and puts the texture where people actually look.
Sourcing: why the supplier matters as much as the species
Cedar is not a commodity you can reliably buy sight unseen. Widths, grades, moisture content, sawing orientation and the availability of matching mouldings all vary, and a mismatch between a stock trim profile and a custom siding reveal is the kind of detail that haunts a facade. This is where a dedicated cedar yard is genuinely useful: suppliers such as Liberty Cedar carry shingles and shakes, western red cedar lumber, pattern siding, timbers and white cedar lumber alongside mouldings and custom millwork, which means the siding, the trim and the exposed timber work can be specified as one coherent package rather than assembled from three unrelated sources. Ask what grades are typically stocked, whether a profile can be milled to match existing work, and how material should be handled on site before installation begins.
Installation details that decide the lifespan
- Acclimate the wood. Stack it off the ground, under cover, with air moving through it for several days before it goes up. Installing wet cedar and watching it shrink is the single most common self-inflicted wound.
- Finish all six sides. Back-prime or back-coat boards and shingles, including cut ends, before installation. Moisture entering an unsealed back face is what drives cupping and finish failure.
- Use stainless steel fasteners. Cedar’s natural extractives react with ferrous metals and leave black streaks. Hot-dip galvanized is sometimes acceptable; stainless removes the argument.
- Build in a drainage plane. A rainscreen gap — furring strips over the weather-resistive barrier — lets the back of the cladding dry and dramatically extends the life of the finish.
- One fastener per board where the profile allows. Over-nailing restrains natural movement and causes splits. Let the wood move.
- Keep clearances. Hold siding above grade, roofs and decks, and keep sprinklers and shrubs away from the wall.
Planning for maintenance you can actually sustain
Choose your finish strategy for the owner, not the photograph. Letting shingles weather naturally means almost no recoating obligation, but it requires accepting uneven greying and occasional shingle replacement. Semi-transparent stain typically wants attention every handful of years, depending on exposure, with south and west elevations going first. Solid film finishes look sharpest on day one and demand the most discipline later.
That calculation changes with who maintains the building. Multi-family and shared housing projects, in particular, should weigh exterior upkeep alongside the other home resources that make a residential community genuinely livable, because a facade that needs annual scaffolding is a recurring operating cost, not a one-time design choice. Naturally weathering white cedar shingles on a rainscreen is often the pragmatic answer in those settings.
A short checklist before you order
- Confirm species, grade and sawing orientation in writing, not just the profile name.
- Order trim, mouldings and timbers from the same source as the siding so colors and grades align.
- Decide the finish before delivery, so back-coating happens on schedule.
- Add a modest overage for cuts, waste and a small stash of attic stock for future repairs.
- Specify stainless fasteners and a rainscreen in the contract documents, not on the fly.
Cedar does not ask for much. It asks for the right grade, a way to dry, fasteners that will not stain it, and a decision about finish made before the first course goes on. Get those four right and the wall will look better in twenty years than most new cladding looks on installation day.
Read more: https://grammarexparts.com/odds-payouts-and-rtp-a-plain-english-guide-to-gaming-terms/
https://grammarexparts.com/bingo-beyond-the-numbers-themes-pictures-and-digital-presentation/










1 thought on “Cedar Siding That Ages Well: How to Choose Shingles, Shakes and Specialty Lumber Before You Build”